After completing the main mission in Cosmo Canyon in Final Fantasy 7 Rebirth, we receive a small side mission from Red’s grandpa Bugenhagen in which we become a photographer.
But photographing the constellations is not that easy. You can find out why you might get stuck when snapping the stars and what you can do about it in the solution here!
Absence of a Sign: Alacran
In the assignment: Absence of a Sign we have to find out what the harbingers are all about and what the constellations tell us. Do they indicate a dark omen? Or is everything okay with the stars?
It’s actually a very relaxed mission, just photographing three constellations. But the whole thing is more difficult than one might initially assume.
But first we have to get Alacran out of the way. These are the creatures that you will find at the three photo locations. But they are not difficult to defeat.
How do I defeat Alacran? These nasty harbingers, which are somehow reminiscent of a scorpion, have a very big weak point. If you have an Elemental Affinity Materia, combine it with the Ice Materia and hit the Alacran without pause.

When the ATB bars are charged, you can use Ice or Eisra to directly attack the Alacran’s weak point. Just keep in mind that if he is vulnerable to shock, he will develop an overall magical resistance ability.
You can save on organics and petrifications, both of which don’t do much or nothing at Alacran.
How do I solve the task in Final Fantasy 7 Rebirth?
We now have to take three different photos and to help us we have the star shower records, i.e. old pictures of the star constellations.
As soon as you have switched off the first Alacran, you can start taking photos. It is really important that you follow the example of the recordings exactly. In the end, you just have to recreate this picture, so to speak, snap it again in exactly the same way – only with the current star constellation.
This is particularly difficult because we have to take into account the 80% agreement. This means that the image really has to be exactly the same, but there can be a 20 percent tolerance.
All three images in the preview!
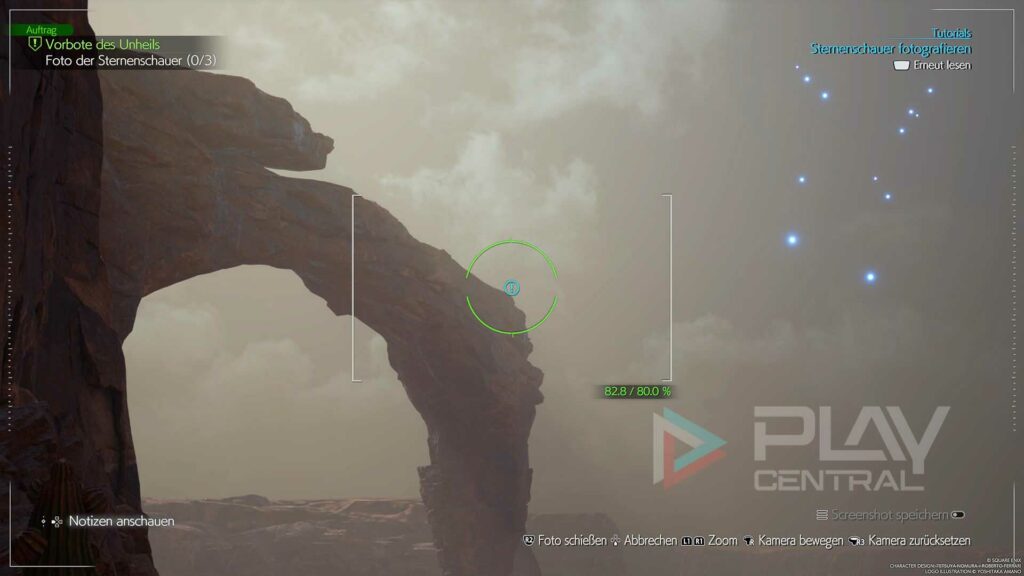
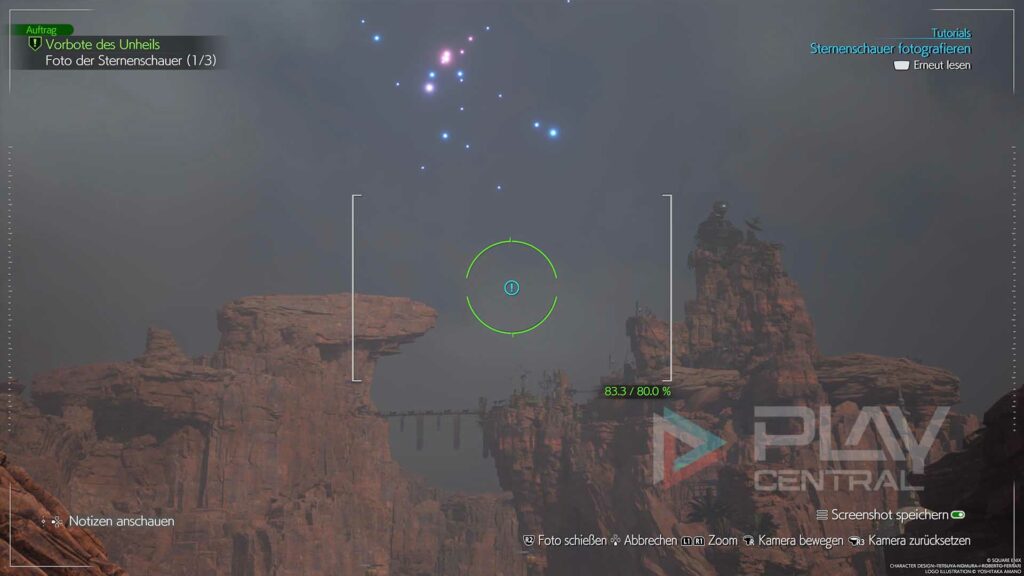
Don’t worry if there are any problems here and there while taking photos. I’ll show you a preview of all three images and how you have to align the camera for each image.
It’s best to avoid zooming at first. Concentrate on positioning Cloud so that the image is directly possible with the current orientation and image section. Try to get the camera section shown to be approximately the same size (and distance) as the subject.
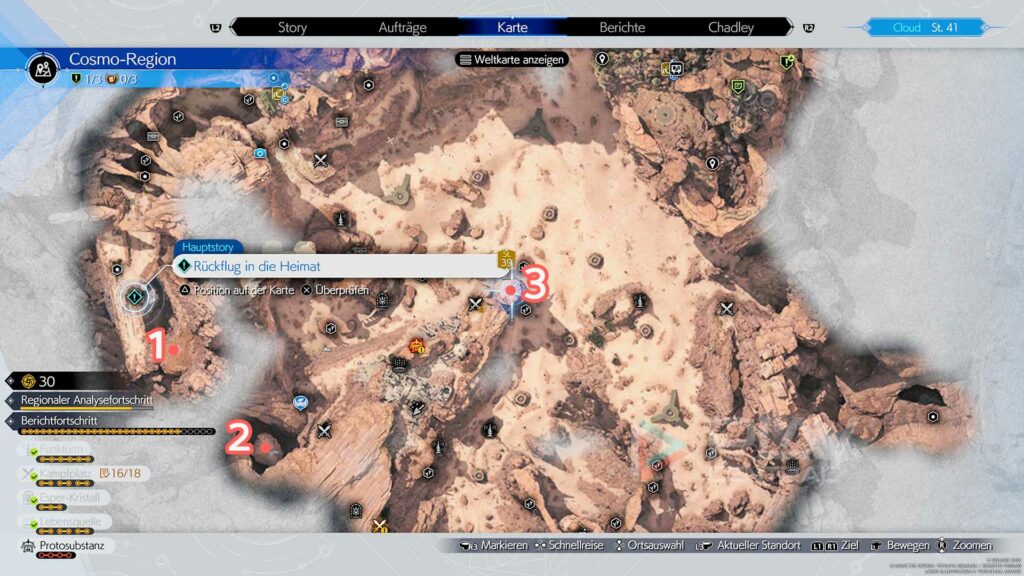
Then you can now gradually walk through the three marked points on the map and try to find the corresponding motif with a match of over 80%.
The first picture at the airport!
The 2nd picture shows Cosmo Canyon!
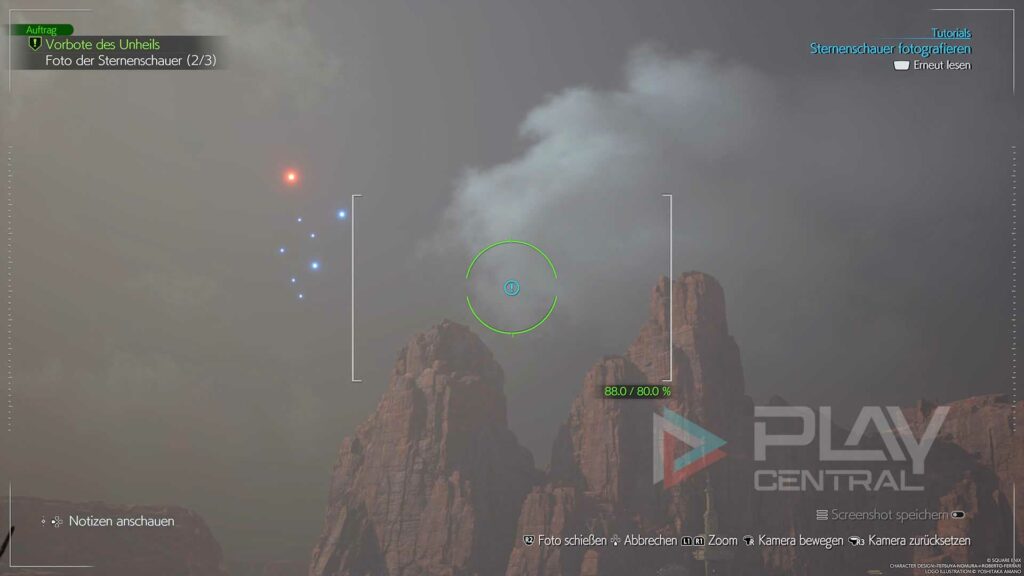
The 3rd picture shows two mountains!
Take pictures of Aerith?
During this mission you can take a few additional pictures of Cloud’s secret flame: Aerith. When Aerith isn’t looking, you can secretly photograph her. But what good does that do?
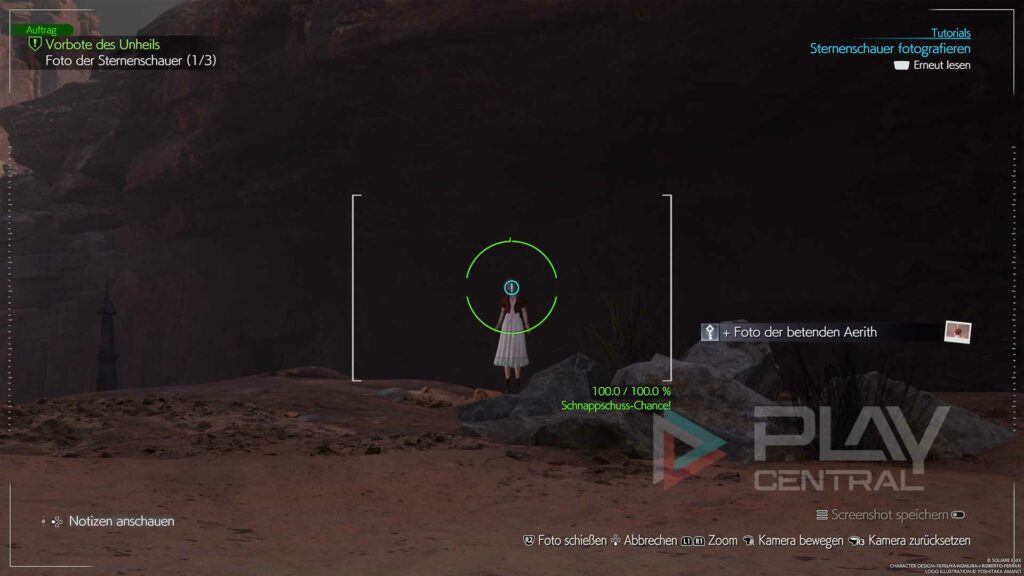
If you take a few photos of Aerith, she will talk to you about it after completing the mission. This will unlock a secret cutscene.
If you want to know what Aerith thinks about Cloud secretly photographing her, you should definitely take some nice photos of Aerith during this mission. This also increases the bond with Aerith.